
Fixes & Solutions: How to Restore MSI Mystic Light Functionality in Windows
Skype Texting Troubles? Here’s How to Restore Your Sending Functionality
 You may often use Skype to contact colleagues and friends. If you somehow aren’t able to send messages on Skype, it’s not only causing inconvenience but annoyance. But don’t don’t worry, there’re practical solutions to Skype not sending messages.
Try these solutions
Here are 4 solutions that have helped other users get Skype sending messages again. You don’t have to try them all, just work your way down the list until you find the ones that works for you.
- Reset Skype
- Update your Skype to the latest version
- Get the classic version of Skype
- Reinstall Skype
Solution 1 – Reset Skype
Resetting Skype to its default settings has solved the Skype messages not sending problem for a lot of users. So, we recommend it as the first option for you to try. Follow the steps below:
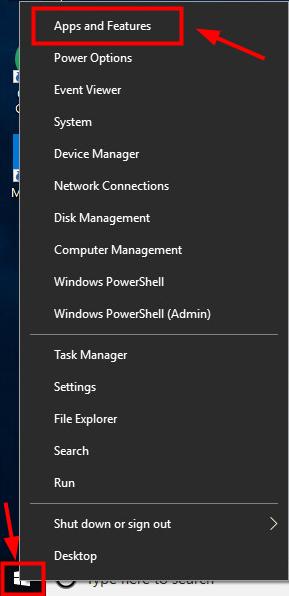
- Right-click theStart button and selectApps and Features .

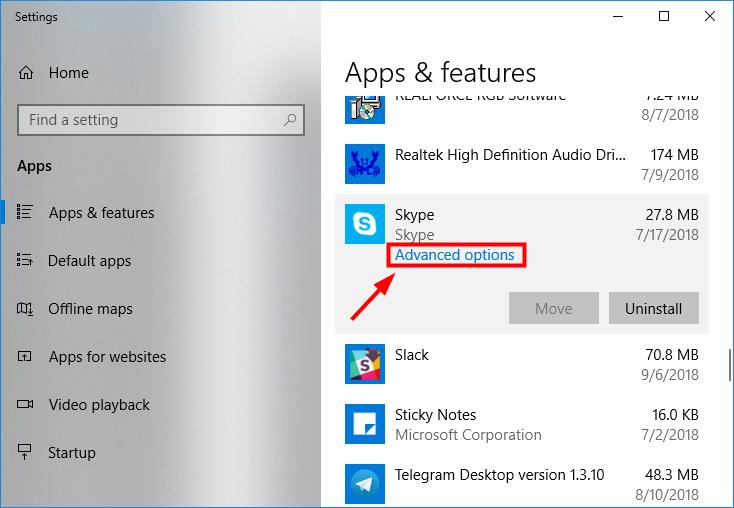
- Navigate to and select Skype, then clickAdvanced options .
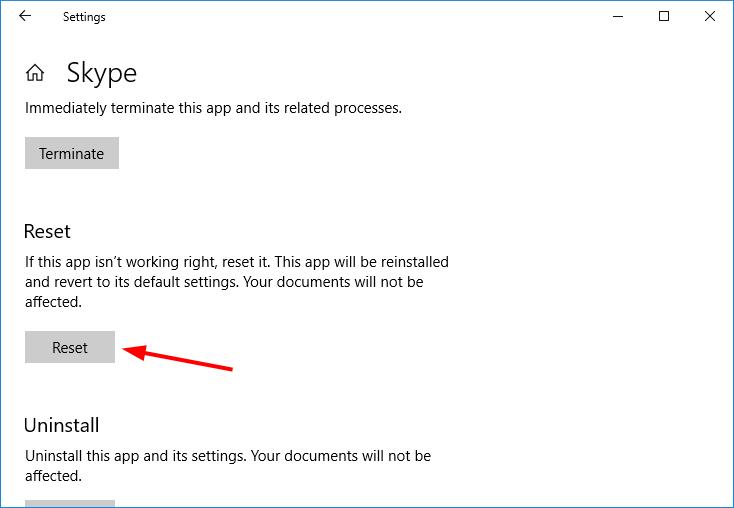
3. Under Reset, click theReset button.
4. ClickReset as confirmation.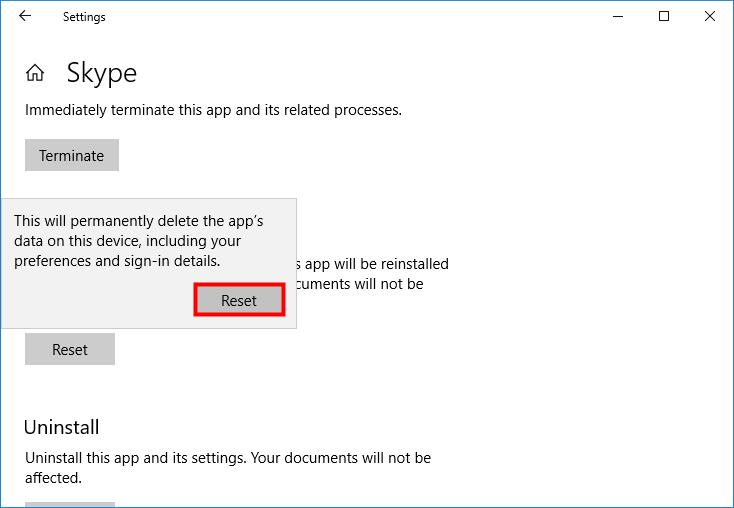
5. When the reset is finished, you’ll see a tick next to the Reset button. Then you can close the Settings window.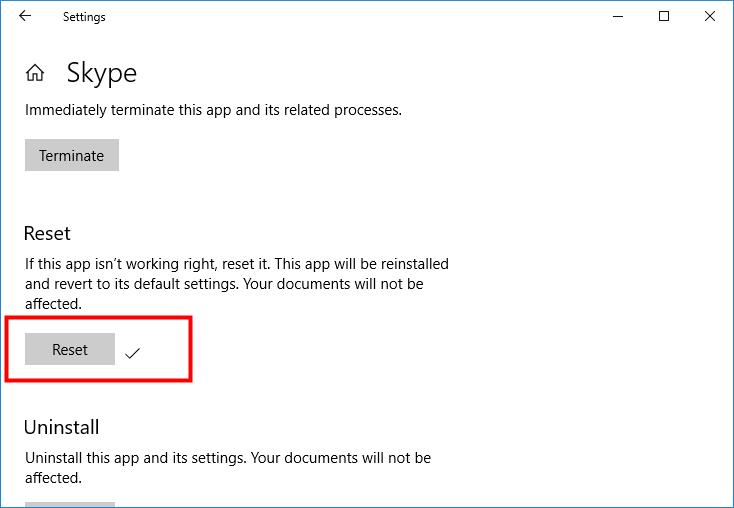
6. Log into Skype and test by sending a message to a contact.
Solution 2 – Update your Skype to the latest version
If you’re using an older version of Skype on Windows 10, you can check for updates in the Microsoft Store to try fixing theSkype messages not sending problem.

ForWindows 7 & 8 users, you can sign into Skype and selectHelp , thenCheck for updates .
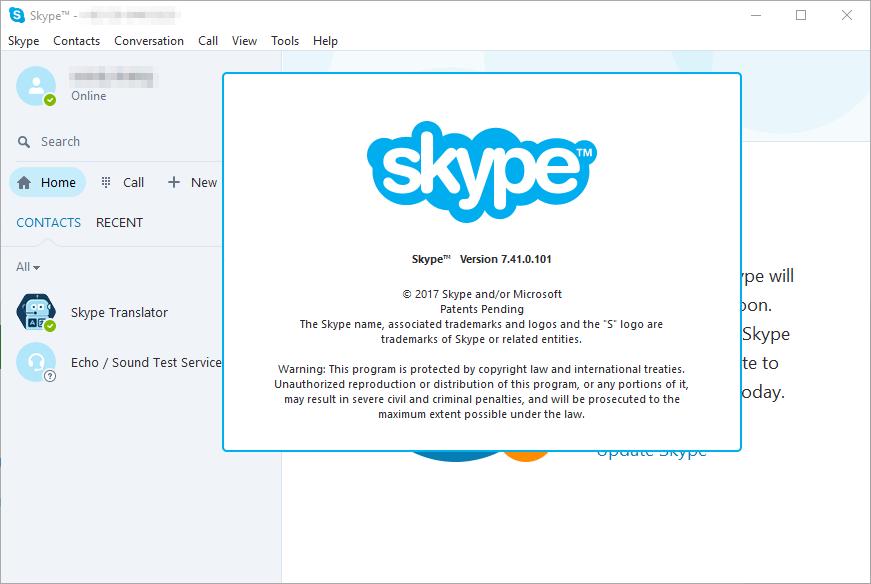
Solution 3 – Get the classic version of Skype
If the above steps produce no results in your Microsoft Skype, then you may try installing the classic version of Skype for your Windows PC. Click this link to download theclassic Skype 7.41.0.101 for Windows.
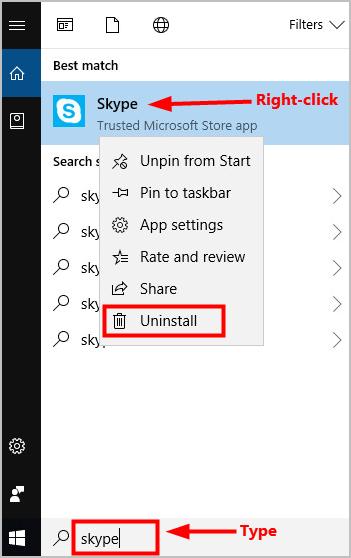
Solution 4 – Reinstall Skype
If feeling at your wit’s end, you might as well try reinstalling Skype to fix the issue. Follow these steps:
- Typeskype in the Windows search box,right-click on Skype and selectUninstall .
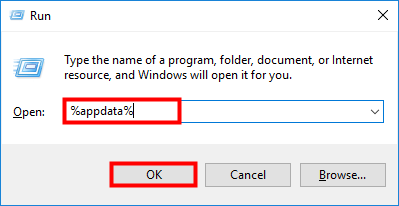
- On your keyboard, press the Windows
key and R at the same time to open the Run box.

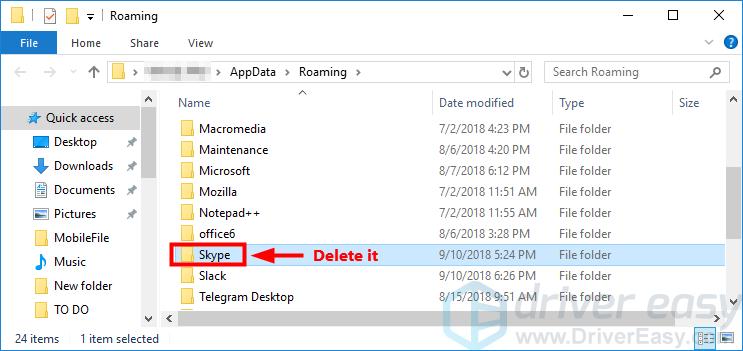
- Type**%appdata%** and clickOK .
- Select theSkype folder anddelete it to completely remove Skype from your computer.
5. Click this link to download Skype.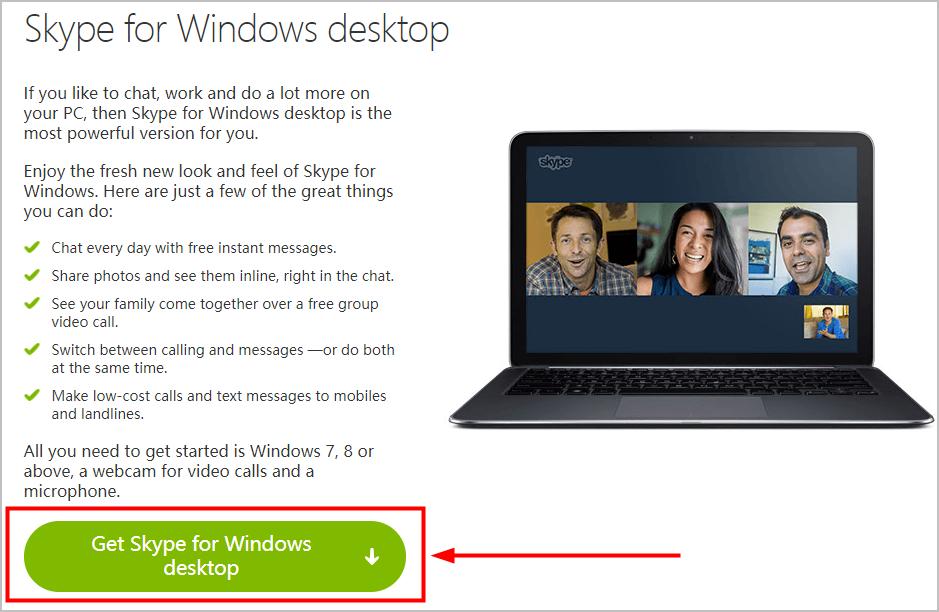
6. When the download is completed, open the downloaded file and follow the onscreen instructions to reinstall Skype on your PC.
Hopefully this fixes your problem.
Bonus tip
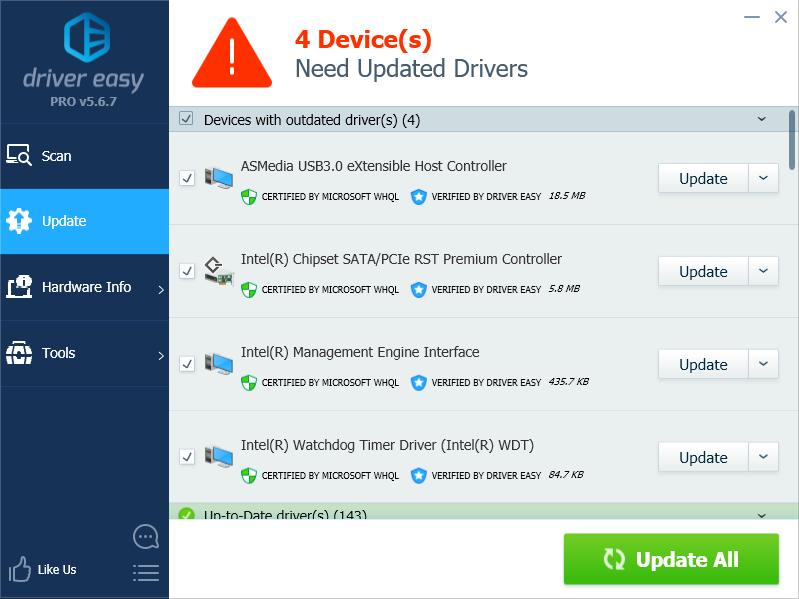
As you may often video chat with your contacts on Skype, to ensure a smooth chat, you should keep your device drivers up to date.
If you don’t have the time, patience or computer skills to update all your drivers manually, you can do it automatically with Driver Easy . You don’t need to know exactly what system your computer is running, you don’t need to risk downloading and installing the wrong driver, and you don’t need to worry about making a mistake when installing. Driver Easy handles it all.
- Download and install Driver Easy.
- Run Driver Easy and click Scan Now . Driver Easy will then scan your computer and detect any problem drivers.
- ClickUpdate next to any flagged devices to automatically download the correct version of their drivers, then you can install them manually. Or clickUpdate All to automatically download and install them all automatically. (This requires the Pro version – you’ll be prompted to upgrade when you clickUpdate All . You get full support and a 30-day money back guarantee.)

If you need assistance, please contact Driver Easy’s support team at**support@drivereasy.com .**
Also read:
- [Updated] 2024 Approved An Anthology of Admiration Highlighting Top 10 Reddit Threads
- 9 Solutions to Fix Process System Isnt Responding Error on Samsung Galaxy A14 5G | Dr.fone
- Basic Tips for Windows Clown Phonetics Modification for 2024
- Borderlands 3 Play Smoother, No More Unexpected Pauses – A Comprehensive Guide
- Decoding the Difficulties: A Comprehensive Guide to Fixing Arise UE4 Catastrophes
- Easy Fixes for Common World of Warcraft (WoW) System Errors: A Player's Handbook
- Effective Strategies to Prevent Constant Crashes in the Luna Client Across Windows Operating Systems
- Expert Advice on Resolving 'Rust Not Responding' Issues - Latest Techniques
- Fixen Sie Das Problem Mit Versteckten Startanwendungen Auf Ihrem Windows 11 PC
- Football Manager 2E020 Fix Guide for Unexpected Shutdowns and Errors
- Friendship-Enhancing Virtual Worlds The Top 10 Metaverse Games
- How To Make Your LinkedIn Profile Professional for 2024
- In 2024, Comprehensive Sync Protocol for iPhone to Snapchat Media
- In 2024, Planning to Use a Pokemon Go Joystick on Apple iPhone 6s? | Dr.fone
- Master Your Pictures: Top 7 Windows Photo Orgers
- Solving Dolby Atmos Issues in Windows 11 and 10: A Step-By-Step Guide
- Solving Visibility Problems - A Comprehensive Look at Rectifying Glitches in Rust Environments
- Step-by-Step Guide: Resolving Devilishly Complex Bugs in Call of Duty Mobile, Modern Warfare & CoDZ
- Top 7 Phone Number Locators To Track Apple iPhone SE (2020) Location | Dr.fone
- Title: Fixes & Solutions: How to Restore MSI Mystic Light Functionality in Windows
- Author: Thomas
- Created at : 2024-12-14 16:53:43
- Updated at : 2024-12-19 04:05:18
- Link: https://program-issues.techidaily.com/fixes-and-solutions-how-to-restore-msi-mystic-light-functionality-in-windows/
- License: This work is licensed under CC BY-NC-SA 4.0.