Fixing Code Vein Screen Flickering: A Step-by-Step Guide
Fixing Battle.net Startup Errors: A Step-by-Step Guide to Get You Gaming Again
Battle.net is your destination for playing Blizzard & Activision games. However, there are circumstances when you cannot even open the program. That’s a nightmare! But we are here to help. In this guide, we’ll walk you through 6 methods to troubleshoot this issue.
Try these fixes
Not all methods are necessary; simply work your way down the list until you find the one that works for you.
(Note: Screenshots below come from Windows 10. If you’re running Windows 11, your screen might look slightly different. )
- Run Battle.net as an administrator and in compatibility mode
- Allow Battle.net through Windows Firewall
- Close conflicting programs running in the background
- Download & install all Windows updates
- Update your drivers
- Repair corrupted system files

Image source: battle.net
1. Run Battle.net as an administrator and in compatibility mode
When a program fails to launch, it may due to the lack of administrative rights. All you have to do is try to open your Battle.net as an administrator. In addition, running it in compatibility mode is aslo one way to fix common issues. Simply follow the steps below.
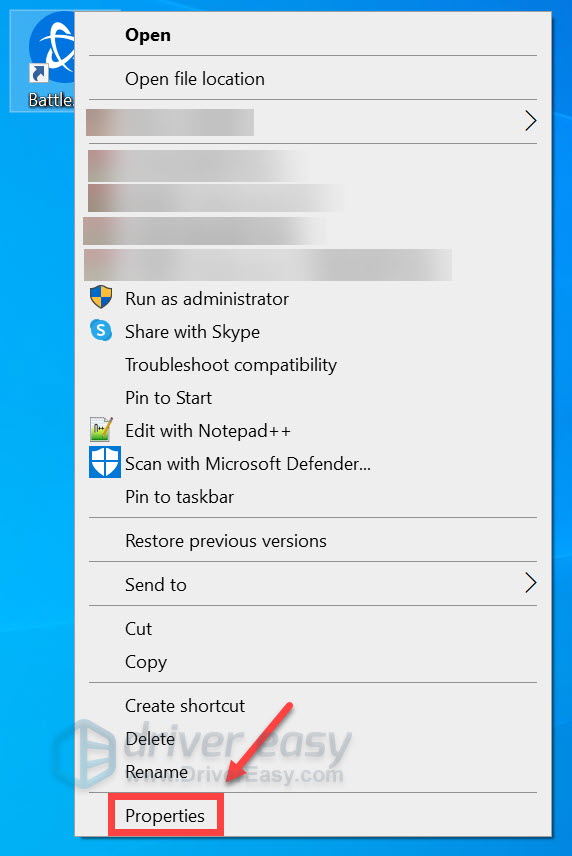
- Right-click on the Battle.net shortcut and selectProperties .
2. Select theCompatibility tab. Check the box next toRun this program in compatibility mode for: andRun this program as an administrator . Then clickApply > OK .
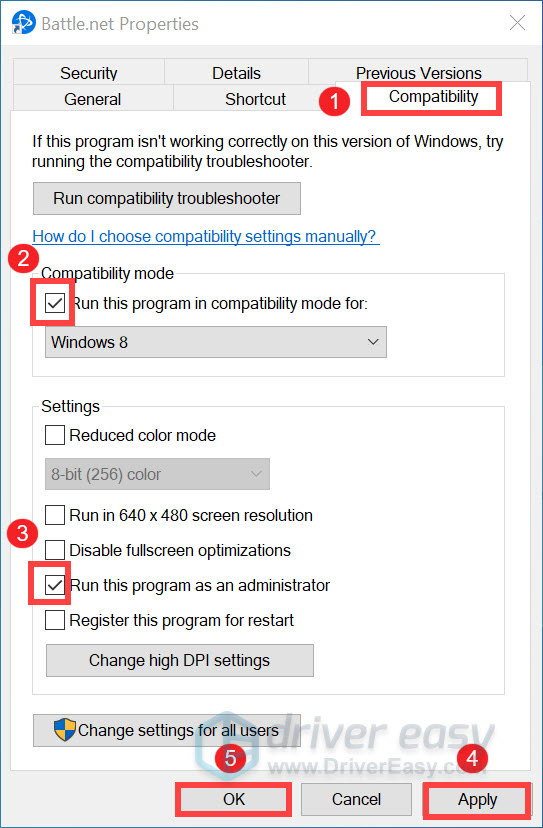
After applying the changes, open Battle.net. When the UAC prompt shows up, simply clickYes . If it isn’t opening, don’t fret! Below are some other methods you can try.
2. Allow Battle.net through Windows Firewall
Windows Firewall is an important part of a layered security model that helps protect your computer from malicious attacks by blocking unauthorized network traffic flowing into or out of the local device. However, sometimes it may mistakenly identify your legitimate programs such as Battle.net as security threats and prevent them from launching. To verify if that’s your case, you should perform the steps as follows to manually add Battle.net to your Windows Firewall whitelist.
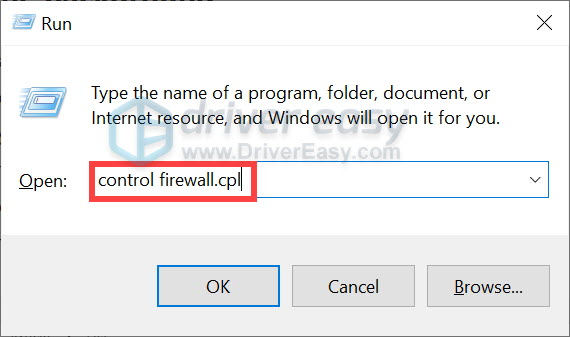
- On your keyboard, press theWindows logo + R keys simultaneously to open the Run box.
- Typecontrol firewall.cpl and hit Enter.
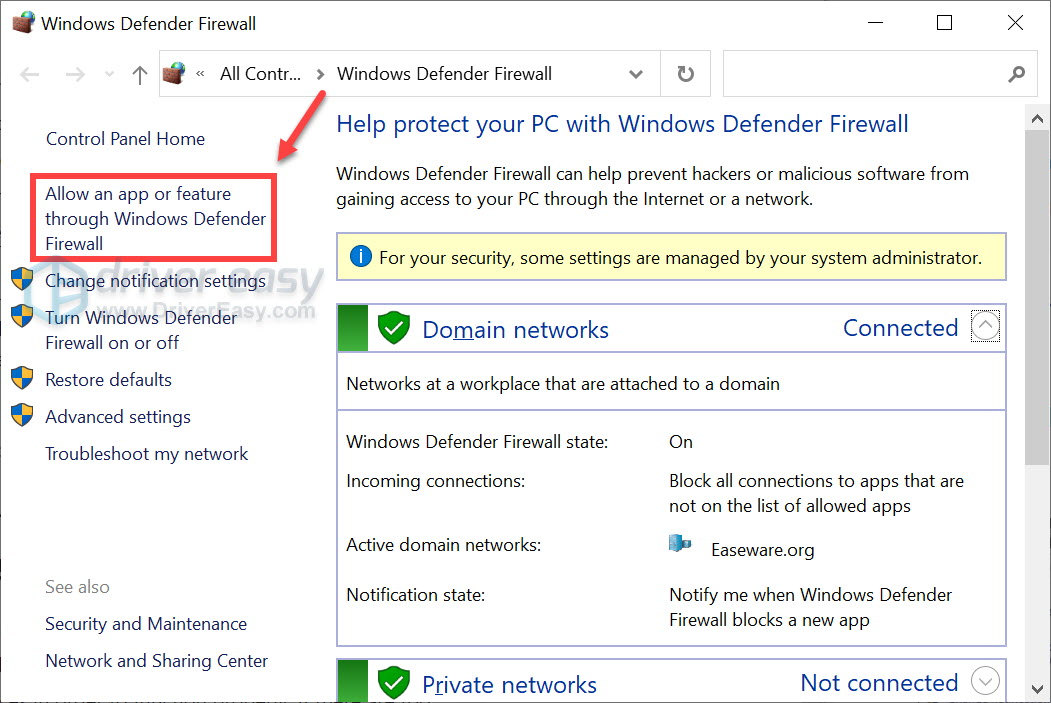
3. From the left navigation pane, clickAllow an app or feature through Windows Defender Firewall .
4. Scroll down and check if Battle.net is on the list. If it isn’t, proceed to add it to the exception list.
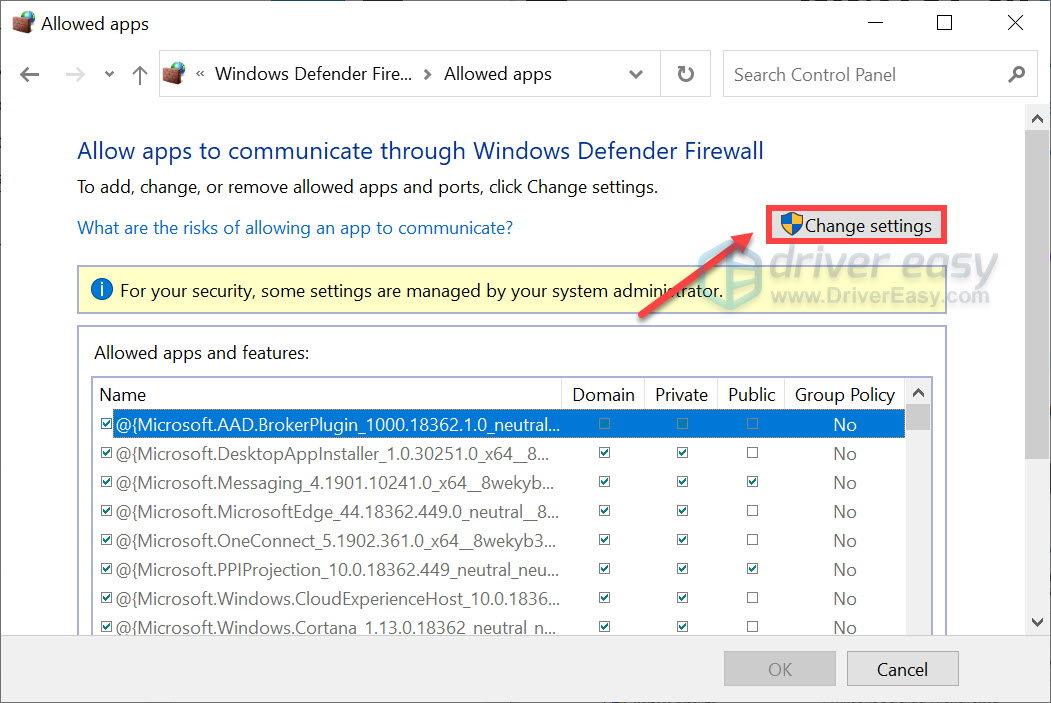
5. Click on theChange settings button.
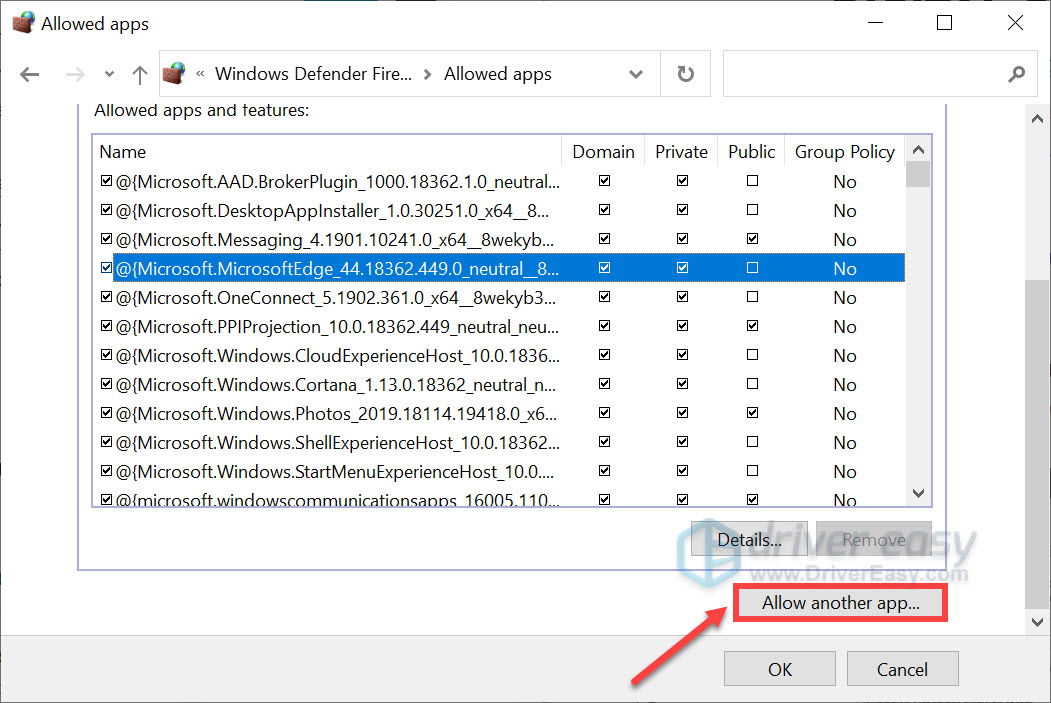
6. ClickAllow another app… .
7. ClickBrowse… and go to the installation folder.
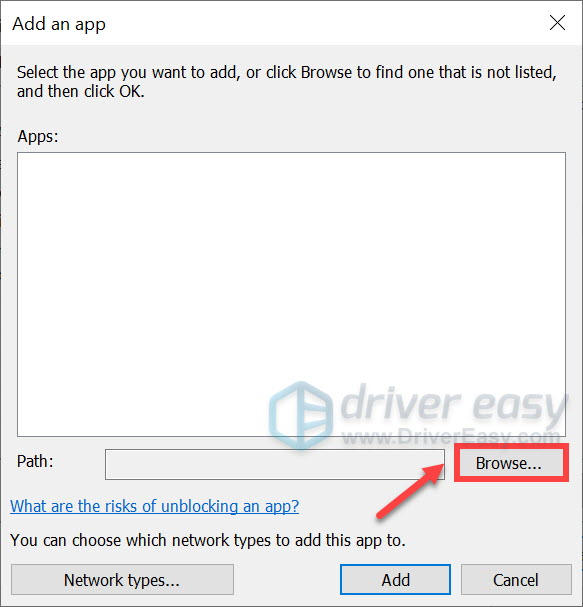
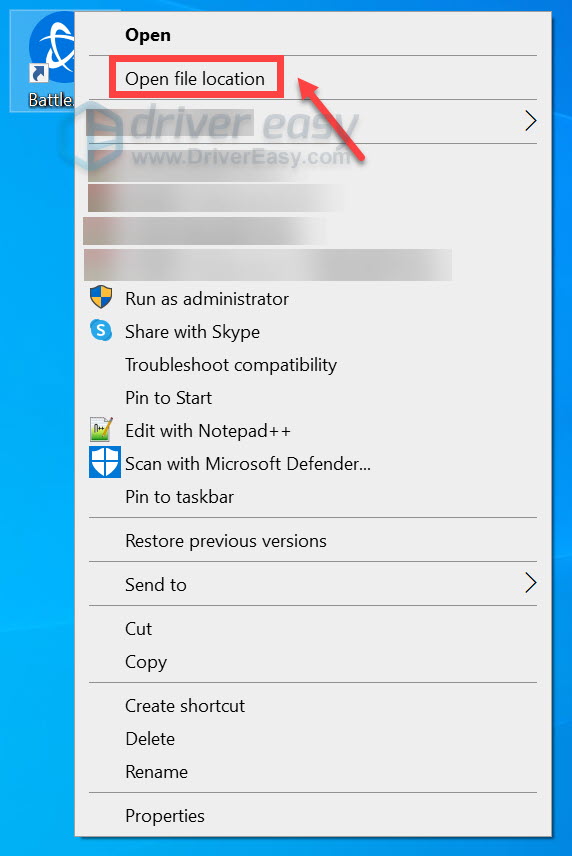
If you have no idea of where the installation folder is, simply right-click on the shortcut and selectOpen file location .
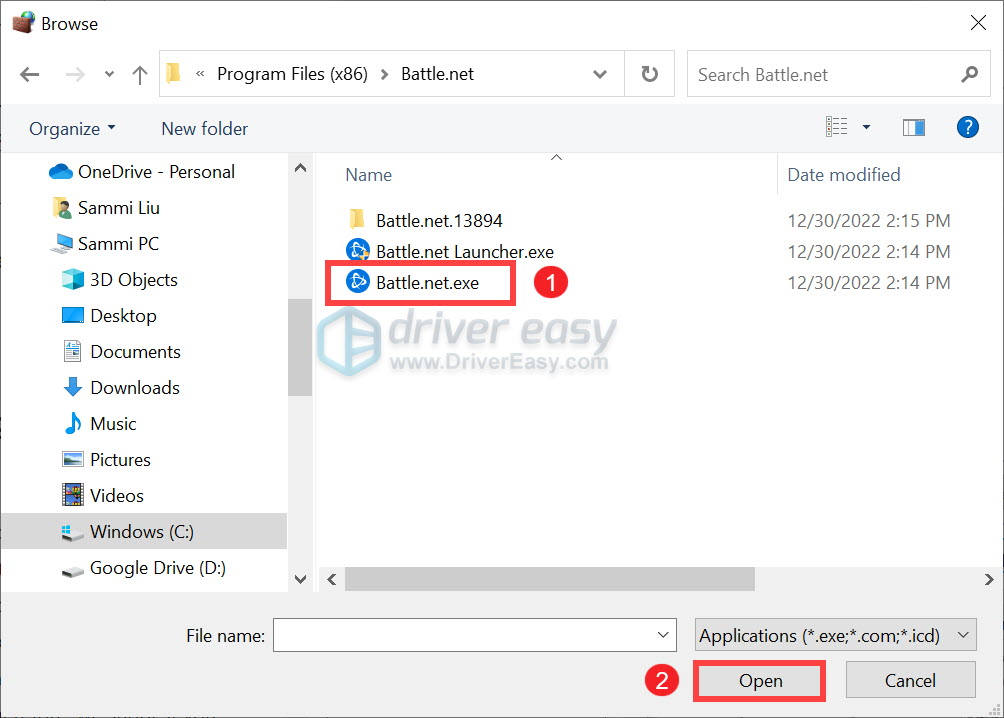
8. FindBattle.net.exe and click on it. Then clickOpen .
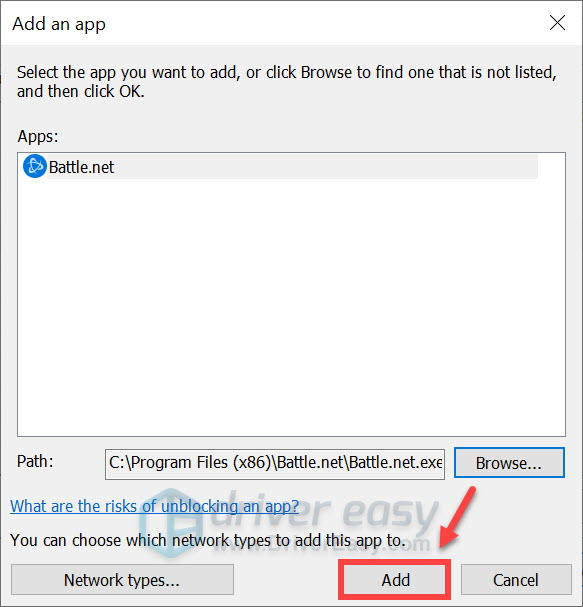
9. When it’s located, clickAdd .
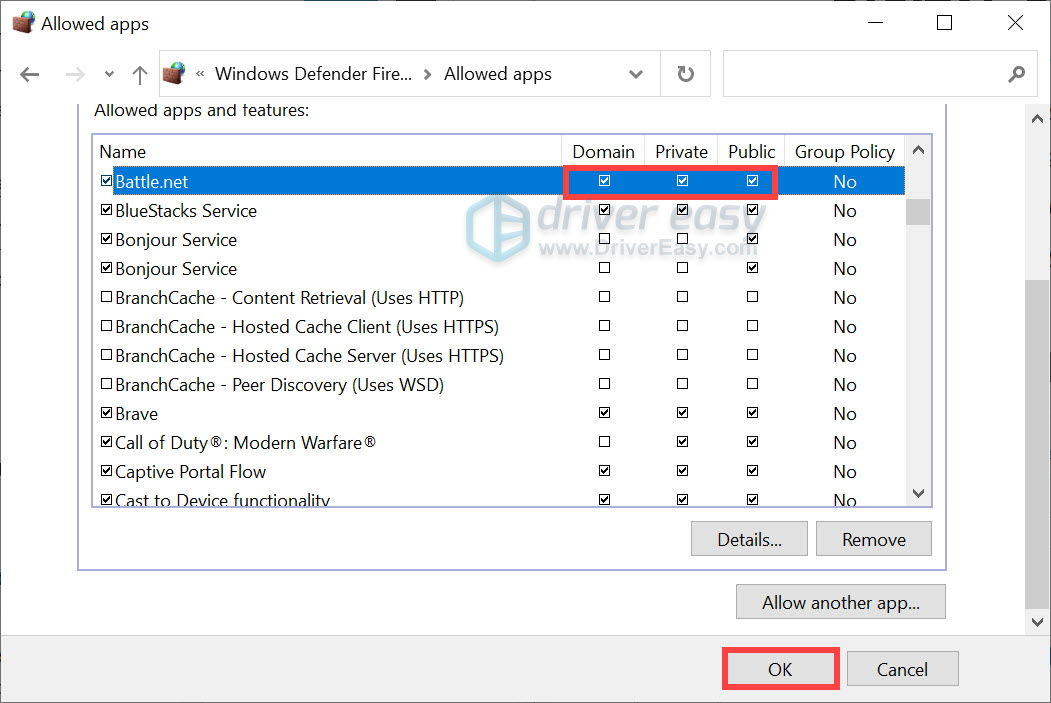
10. Now make sure Battle.net is added to the list and tickDomain ,Private , andPublic . Once you’re done, clickOK .
Now open Battle.net. If it isn’t opening, try the next fix below.
3. Close conflicting programs running in the background
Failure to launch a program may occur when there are software conflicts. In addition, at times, Batte.net may require significant system resources in order to function properly. If there are too many programs running in the background, they can eat up your system resources and thus make your resources insufficient for other programs. Therefore, we suggest you disable them while you’re using Battle.net. Below are the steps you can take to do this.
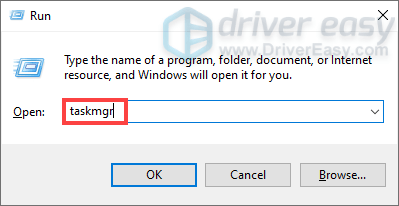
- On your keyboard, press theWindows logo + R keys to open the Run box.
- Typetaskmgr and hit Enter to open the Task Manager.
3. Under the Processes tab, right-click the programs that are most likely to cause interference, such as Razer Synapse and those that are eating up your resources. Then select End task .
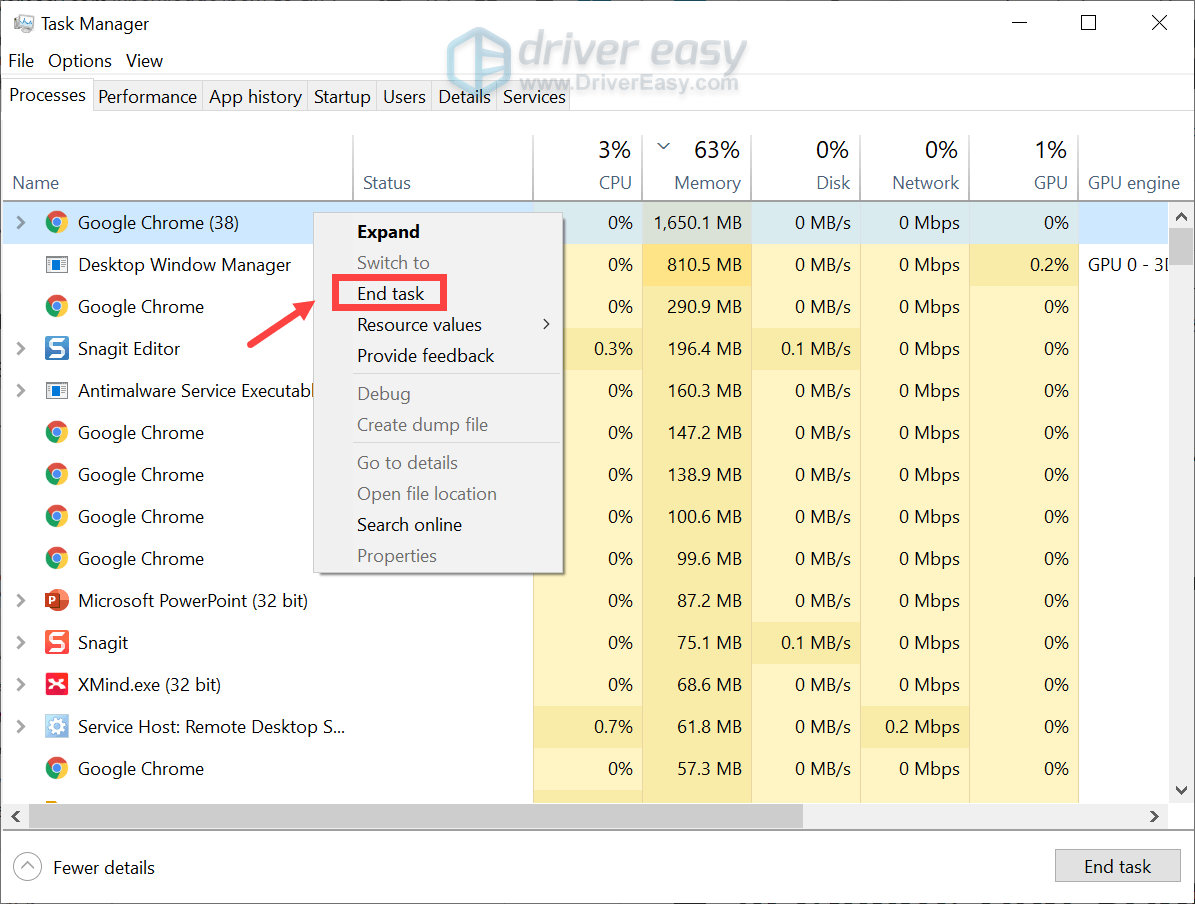
When you’re done, open the agent and check if your problem has been resolved. If it persists, move on to the next fix.
4. Download & install all Windows updates
Your issue may have something to do with your outdated Windows version. To troubleshoot your issue, you should download and install all Windows updates, which usually bring new features and most importantly, bug fixes. To do this, follow the instructions below.
- In the search box on the taskbar, typecheck for updates . Then click Check for updates from the list of results.

2. ClickCheck for updates . Then it will start checking for updates. When updates are available, follow the on-screen instructions to download and install them for your system.
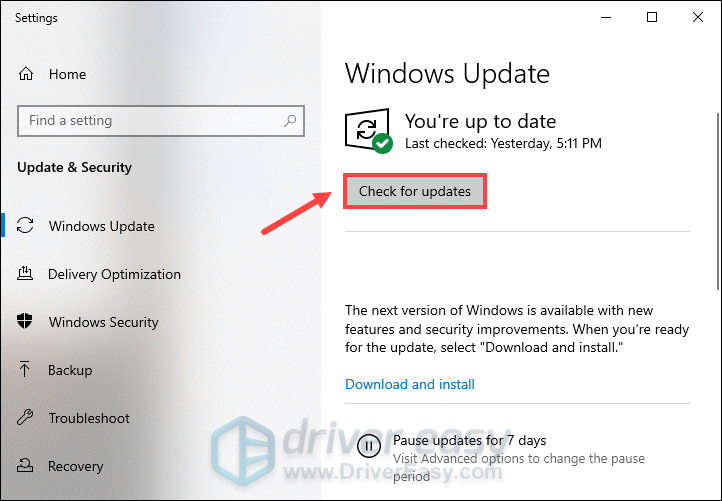
After you’ve finished the process, restart your PC and try to launch the agent. If it still fails to open properly, try the next fix below.
5. Update your drivers
Each piece of hardware on your system, be it your video card, sound card or others, has its own specific driver, which ensures that different hardware components can work smoothly on your system. However, these hardware drivers are susceptible to corruption. When that happens, your PC performance would suffer and some programs may fail to work properly as expected. In this situation, you should attempt to update your drivers.
There are mainly two ways you can update your drivers:manually and automatically .
Option 1: Manually update your drivers
You can update your drivers via the Device Manager:
- On your keyboard, press theWindows logo + R keys simultaneously to open the Run box.
- Typedevmgmt.msc and hit Enter.

3. Click on thearrow > to expand the section. Then right-click on the device that you’re going to update the driver for and selectUpdate driver .
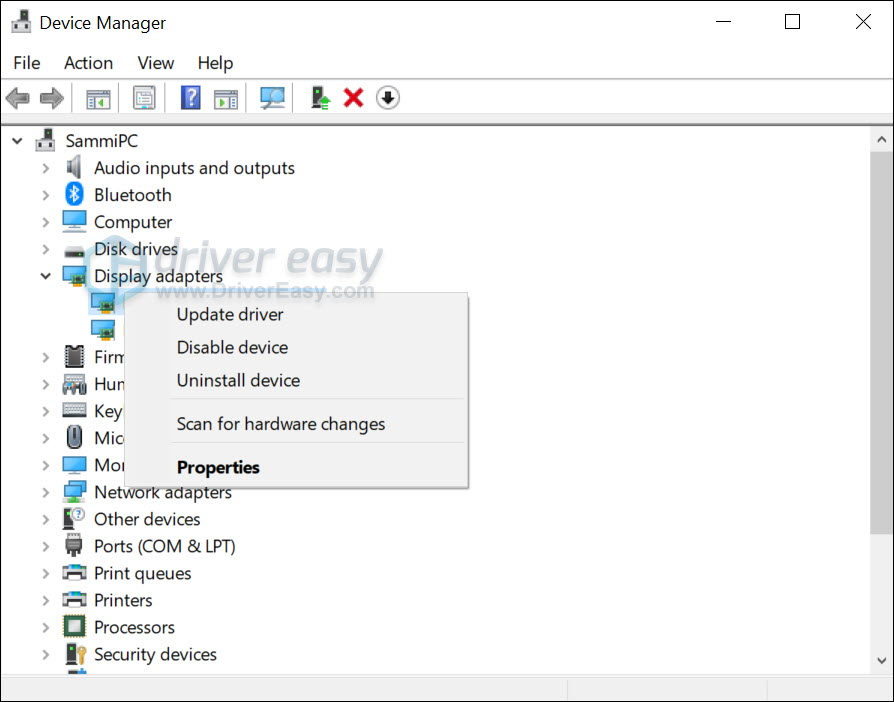
Then follow the on-screen instructions to get the updates.
Option 2: Automatically update your drivers (recommended)
If updating drivers on your own seems like a tedious task for you, you can use a dedicated driver updater Driver Easy to help you do the work without hassle. It’s a useful and legitimate tool that scans for any missing or outdated drivers, then downloads and installs the latest ones for your system, direct from the device manufacturers. With Driver Easy, updating drivers is just a matter of a few mouse clicks.
- Download and install Driver Easy.
- Run Driver Easy and click on the Scan Now button. Driver Easy will then scan your computer and detect any devices with outdated drivers.
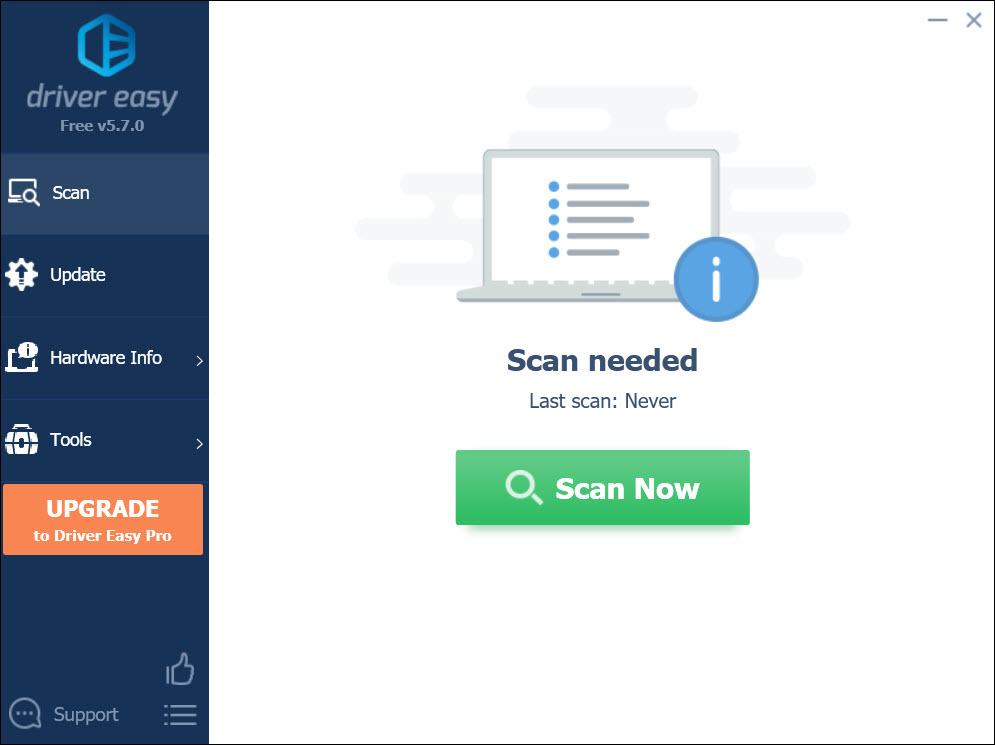
3. Click Update All . Driver Easy will then download and update all your outdated and missing device drivers, giving you the latest version of each, direct from the device manufacturer.
This requires the Pro version which comes with full support and a 30-day money-back guarantee. You’ll be prompted to upgrade when you click Update All. If you don’t want to upgrade to the Pro version , you can also update your drivers with the FREE version. All you need to do is to download them one at a time and manually install them.

The Pro version of Driver Easy comes with full technical support . If you need assistance, please contact Driver Easy’s support team at [email protected] .
After updating drivers, reboot your PC and then try to open Battle.net. If your problem persists, proceed to the next fix.
6. Repair corrupted system files
If none of the above methods didn’t give you any luck, it’s time to dig deeper. It’s that you might have corrupted system files that could cause a wide variety of issues, ranging from minor glitches to critical performance issues. To check if that’s your case, use System File Checker, a utility in Windows to check for problems with files on your computer and hopefully repair the corrupted ones. To do this, follow the steps below.
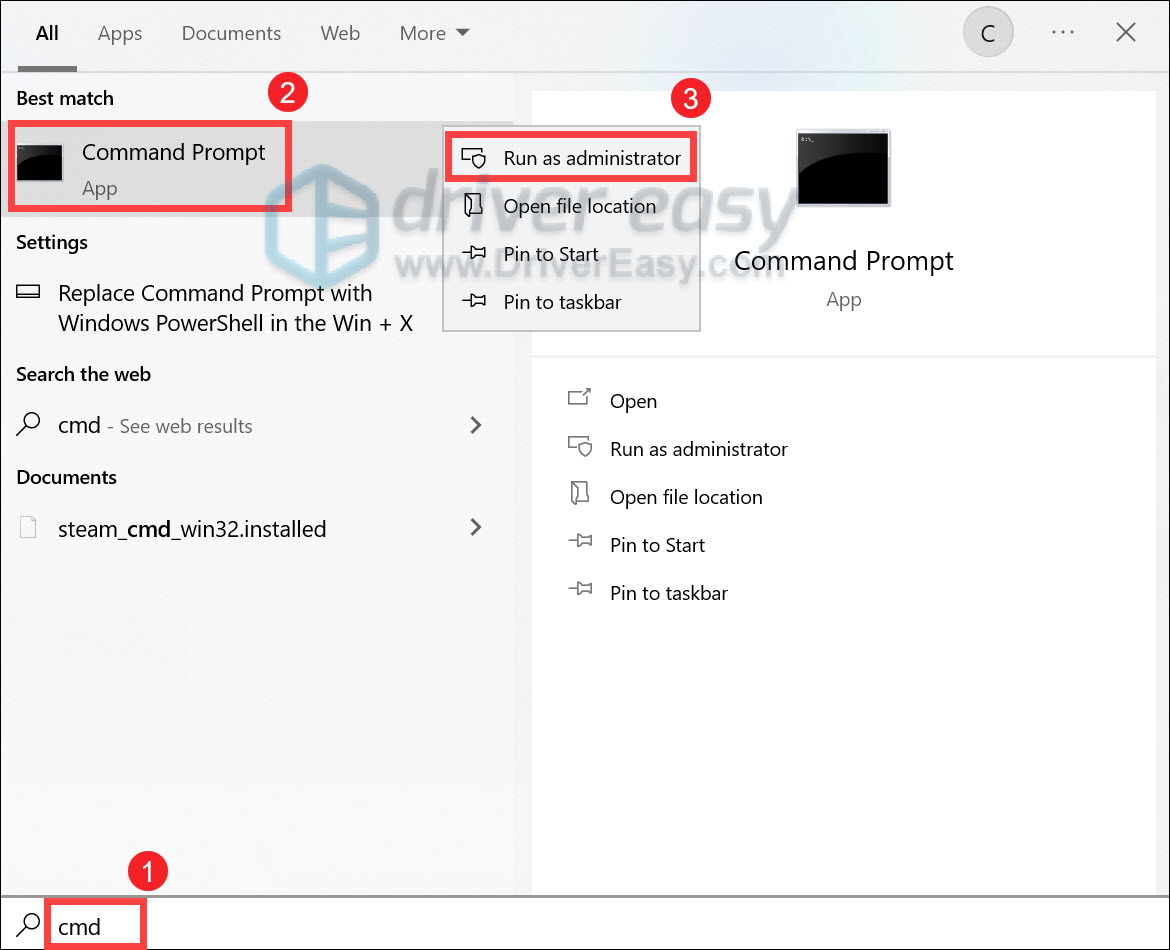
- In the search box on the taskbar, typecmd . Find Command Prompt from the list of results and right-click it. Then selectRun as administrator .
2. ClickYes when you receive a prompt.
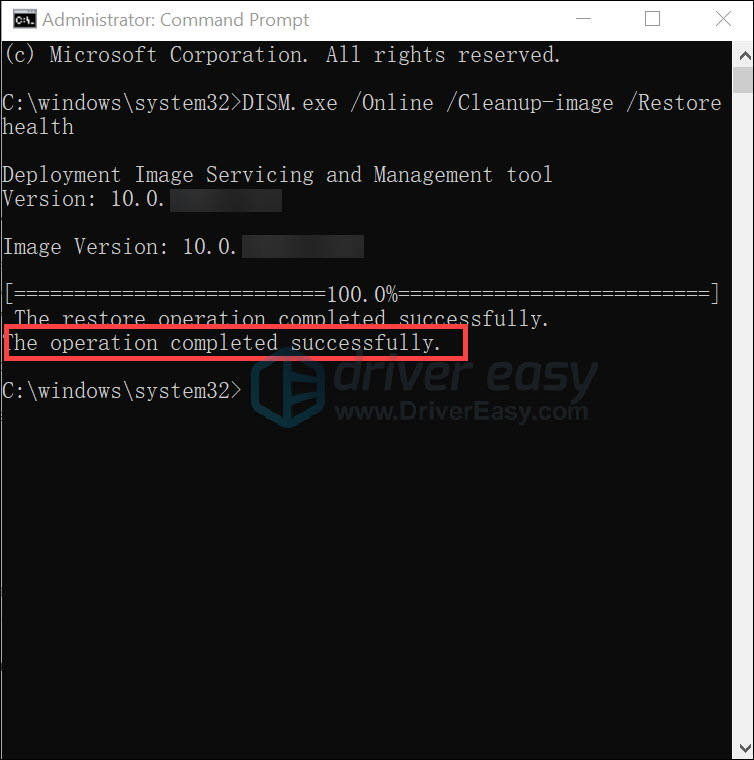
3. Now copy and paste the following command, and then pressEnter .
DISM.exe /Online /Cleanup-image /Restorehealth
4. Wait until you see a message saying “The operation completed successfully.”
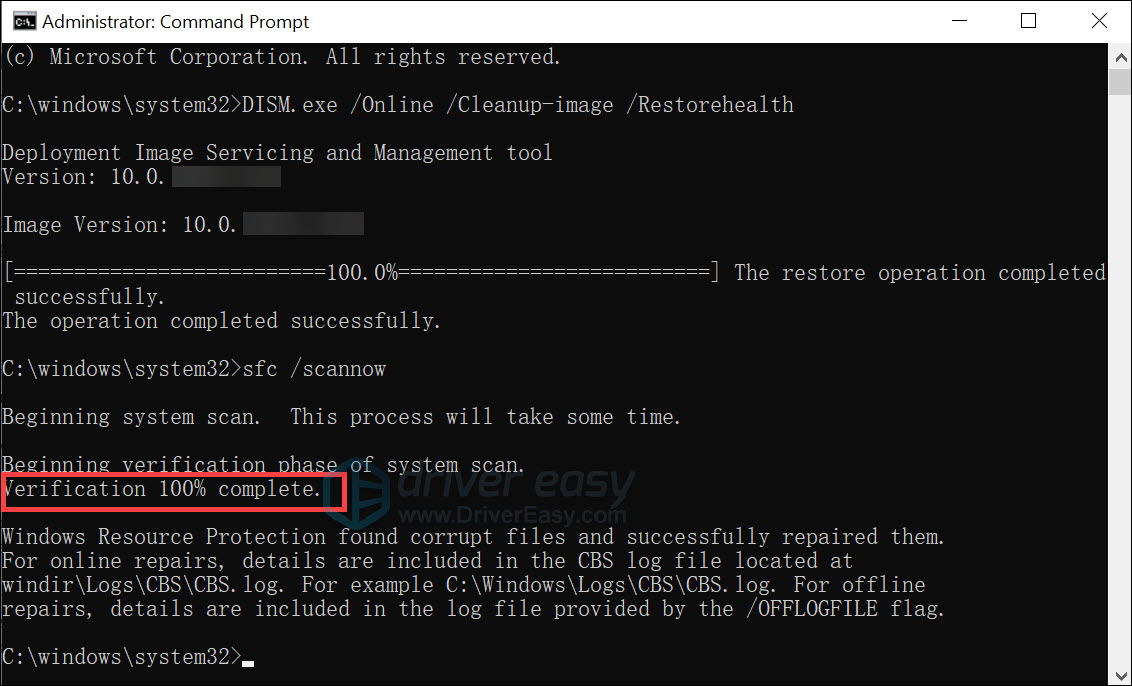
5. Now typesfc /scannow and press Enter. Then it’ll start scanning the integrity of all protected operating system files and replace incorrect, corrupted, changed, or damaged versions with the correct versions.
When you see a message that says “Verification 100% complete”, typeexit and press Enter.
However, if that fails to fix an underlying problem, you’ll need a more advanced tool to help you with that. Fortect is such a tool that specializes in Windows repair. It’ll help replace damaged or missing Windows files with healthy ones and restore your PC back to its greatness. And it’s more than that. Fortect can protect and remove malware from your PC, as well as detect threatening apps before it’s too late!
To scan for and fix corrupted system files without hassle, take the steps below.
- Download and install Fortect.
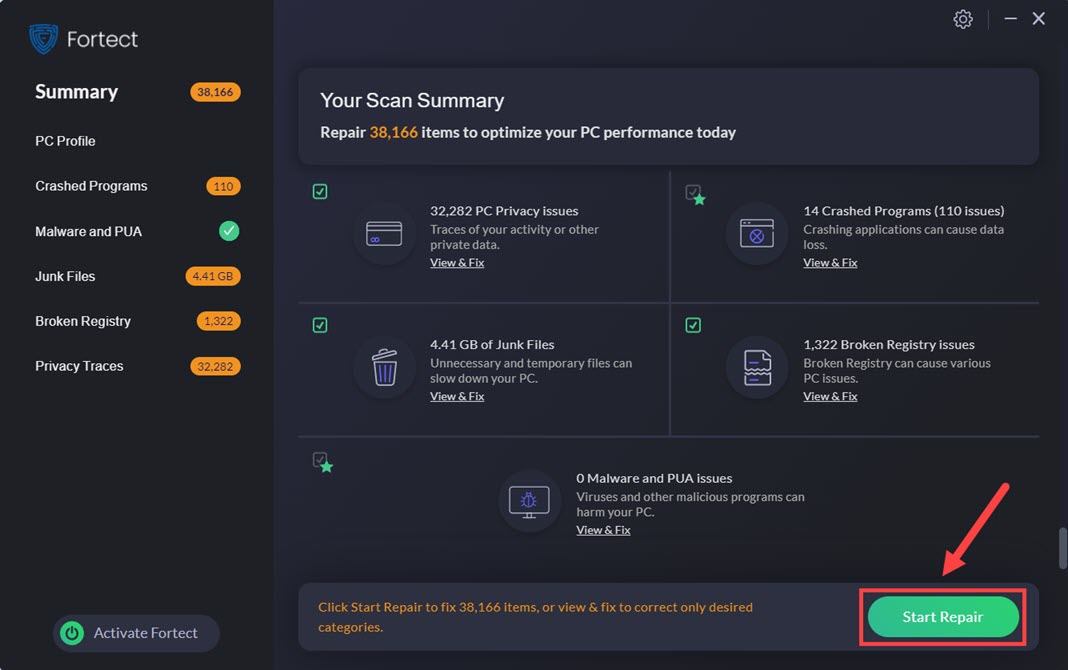
- Launch Fortect and it will run a free scan of your PC. Upon completion of the scan, the software will conduct a diagnosis and show you a summary of system issues. This will take a few minutes.
- If it detects any issues on your PC, click Start Repair to let it start the repairing process.
The repair is available with the paid version of Fortect which comes with and full technical support. If you encounter any issues when using Fortect, do not hesitate to contact their support team.
After the repair, try to launch Battle.net. If, unfortunately, it still fails to open, you’ll need to consideruninstalling and reinstalling the Battle.net app .
- On your keyboard, press theWindows logo + R keys simultaneously to open the Run box.
- Typeappwiz.cpl and hit Enter.

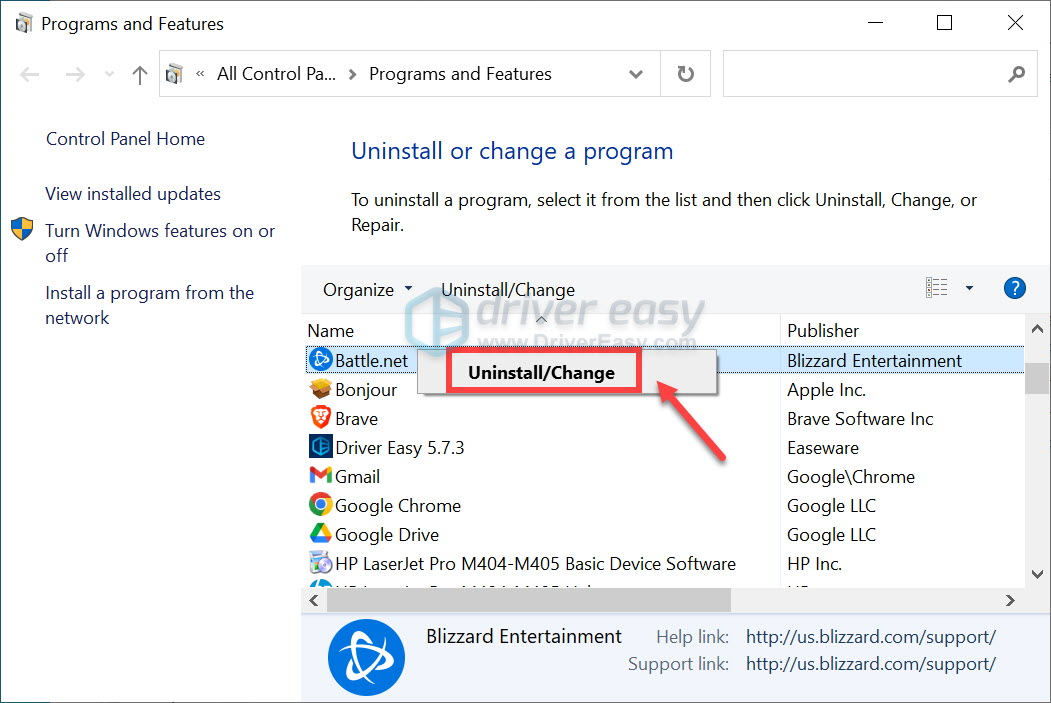
3. LocateBattle.net . Right-click it and clickUninstall/Change .
When you’re prompted for further confirmation, simply click Yes and proceed. After it’s successfully uninstalled. Go to the place where the Battle.net-Setup.exe file was installed and delete it. Then download and install it from theofficial website .
That’s it – the full guide on how to troubleshoot your Battle.net not opening issue. Hope it helps! If you have any problems regarding this troubleshooting guide, feel free to drop us a line in the comment section below. We’ll get back to you ASAP.
Also read:
- [New] Hit Parade The Top 10 Songs on Spotify for 2024
- [Updated] 2024 Approved Frameworks Producing Uplifting Life Journey Broadcasts
- Addressing and Repairing Frequent Crashes in Madden NFL 21 While Playing on Your Desktop or Laptop
- Cod: Black Ops Cold War Launch Problems for PC Users Solved
- Complete Guide to Hard Reset Your OnePlus Nord CE 3 Lite 5G | Dr.fone
- Expert Advice on Correcting Your Gaming Software's Unexpected Quits
- How to Mirror Samsung Galaxy M34 to Mac? | Dr.fone
- How to Resolve Audio Issues in Dying Light – Expert Solutions Uncovered!
- In 2024, Video Capture Master Pro X
- Innovative Approaches to Supercharge Your Editing Workflow for 2024
- The Ultimate Solution to Restarting Your iGFXem Module - No More Problems
- Trouble with NieR Revival? Here Are Solutions for Launch Problems
- Troubleshoot and Repair Dreamlight Valley PC Bugs: A Comprehastoverview of Six Fixes
- Try AOMEI Backupper for Free with 30-Day Test Version - Secure Your Files Without Costs
- Ultimate Troubleshooting Guide: Resolving Outpost: Infinity Siege PC Freezes and Crashes
- Unlock a Smooth Start to Your Game: Bypass the Loading Hurdle in Madden 22
- Windows 10でMP4動画をDVDへ変換し、テレビでスムーズに再生する詳細なガイド
- Title: Fixing Code Vein Screen Flickering: A Step-by-Step Guide
- Author: Thomas
- Created at : 2025-01-23 01:37:21
- Updated at : 2025-01-24 10:22:24
- Link: https://program-issues.techidaily.com/fixing-code-vein-screen-flickering-a-step-by-step-guide/
- License: This work is licensed under CC BY-NC-SA 4.0.